Chapter 1

Installation

This guide will cover the installation process for Skcrew on your server.

First Steps

The first steps for installing Skcrew on your server.

Compatibility

Skcrew addon compatibility with different server versions and modules.
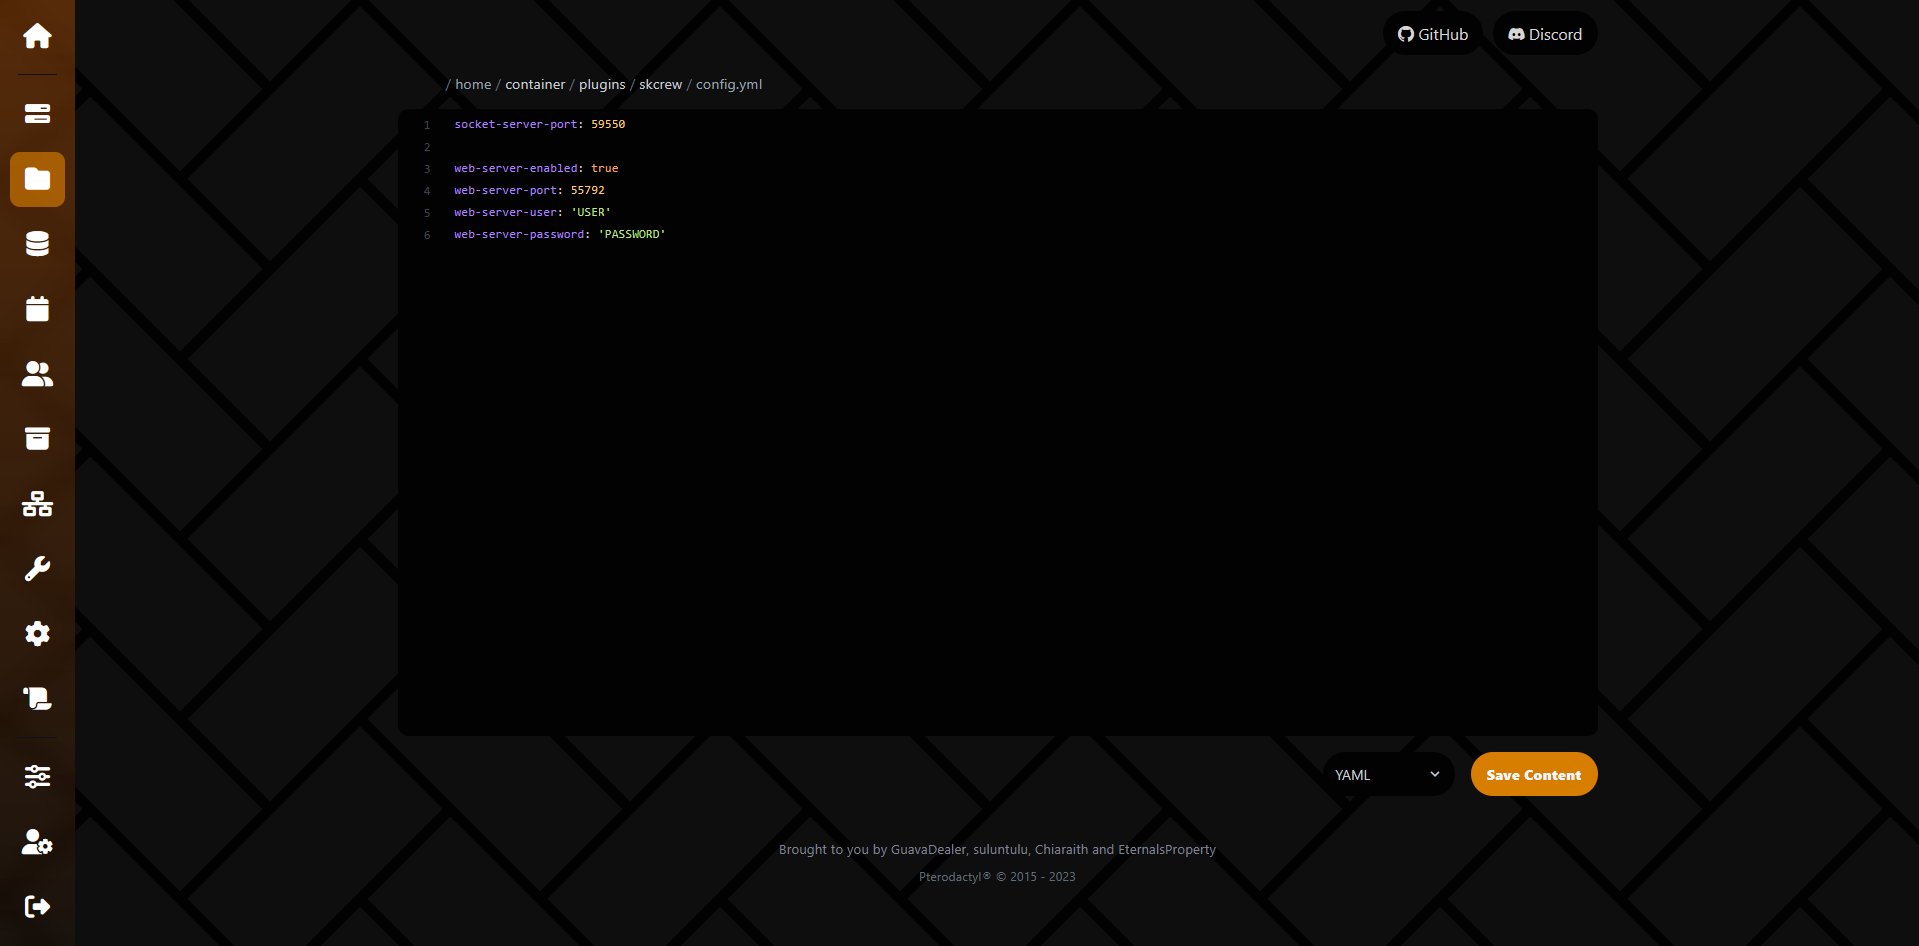
Configuration

Configuring Skcrew on your server.

Proxy Setup

Setting up Skcrew on a proxy server.

Subsections of Installation

Chapter 1

First Steps

  1. Download the latest version from HERE and move the downloaded file into the plugins/ directory inside the server.

  2. After launching the game or proxy server, the Skcrew directory will be created in the plugins/ directory.

    This directory contains the addon configuration file. In it, you can enable or disable certain modules, as well as adjust some settings, if necessary.

Requirements

Last updated: Skcrew v4.4.2

  • Java 8 or newer
  • PaperMC (spigot might work, but it is not recommended) 1.8.8 or newer
  • Skript 2.6 or newer

No support will be given for SpigotMC Servers , and BungeeCord proxies.
We recommend using PaperMC Servers and Velocity Proxies for the best experience.


Chapter 2

Compatibility

No support will be given for SpigotMC Servers , and BungeeCord proxies.
We recommend using PaperMC Servers and Velocity Proxies for the best experience.

Modules are the core of Skcrew, they provide additional functionality to Skript.
The following table shows which modules are compatible with which server versions.

Module1.8.81.12.21.14+
Bitwise
Files
Floodgate
GUI
Interpret
Maps
Other
Packets
Permissions
Requests
Runtime
Sockets
SQL
String-utils
ViaVersion
World

Certain features of some modules are only available on certain server versions.
The following table shows the compatibility these features:

ModuleFeature1.8.81.12.21.14+
Other Equipment accounted damage

If a feature is not listed in the table, it is compatible with all supported server versions.

A module that is incompatible with your server version will not be loaded, and you will not be able to use it in your scripts.


Chapter 3

Configuration

This guide showcases the default configuration for Skcrew.
The configuration can be changed in the Skcrew directory, inside the config.yml file.

The default configuration for a back-end server ( PaperMC , Spigot , etc.):

advancements:
  enabled: true
bitwise:
  enabled: true
files:
  defaultsync: "async" # default sync type for file operations (async/sync)
  enabled: true
floodgate:
  enabled: true
gui:
  enabled: true
interpret:
  enabled: true
maps:
  enabled: true
other:
  enabled: true
packets:
  enabled: true
permissions:
  enabled: true
requests:
  enabled: true
runtime:
  enabled: true
sockets:
  enabled: false
  server-address: "127.0.0.1"
  server-port: 1337
  client-autoreconnect-time: 5
sql:
  enabled: true
string-utils:
  enabled: true
viaversion:
  enabled: true
world:
  enabled: true

The advancements module is currently not functional.
Do not use it, as it does nothing (for now ).


Default configuration for a proxy server ( Velocity or BungeeCord ):

socket-server-port: 1337

web-server-enabled: true
web-server-port: 1338
web-server-user: admin
web-server-password: admin

Chapter 4

Proxy Setup

This guide provides detailed instructions for installing Skcrew on a proxy server.
The setup utilizes Velocity and PaperMC .
Additionally, the BonfireMC version of the Pterodactyl Panel is used to configure networking.

Please note: The BonfireMC version is not publicly available.
However, the process is essentially the same for the standard Pterodactyl Panel.


PS: This guide is not a complete tutorial on how to set up a proxy network, but rather a guide on how to set up Skcrew on a proxy server.


Setting up Skcrew for networking on a Proxy Server.

Step 1: Install Skcrew on the Proxy Server.

To install Skcrew on the proxy server, follow these steps:

  1. Download the latest version of Skcrew from the Releases section on GitLab.

  2. Move the downloaded file into the plugins/ directory of the proxy server.

  3. Start the proxy server.

Step 2: Allocate ports for Skcrew.

To allocate ports for Skcrew, you will need to head over to the Networking section of the Pterodactyl Panel.
In the Networking section, you can allocate ports for your proxy server.
To do this, follow these steps:

  1. Navigate to the Networking section of the Pterodactyl Panel.
    Looks like this:

    Networking Tab
  1. Click on the Create Allocation button (Twice).
    Creating Port Allocations

    Optionally, you can give them a name, such as Skcrew and Skcrew web api or something similar.

  1. Copy the allocated ports to your clipboard.
    In this case, the ports are 59550 and 55792.
    We will need these ports in the next step.

Step 3: Configure Skcrew on the Proxy Server.

  1. Open the Skcrew configuration file.
    This file is located in the Skcrew directory inside the plugins/ directory of the proxy server.
  1. Set the socket-server-port to the first allocated port (in this case, 59550).
    This is the port that Skcrew will use to communicate with the proxy server.
  1. Set the web-server-enabled to true.
    This will enable the web server for Skcrew, allowing you to access the Skcrew web API.
  1. Set the web-server-port to the second allocated port (in this case, 55792).
    This is the port that the web server will listen on.
  1. Set the web-server-user and web-server-password to your desired values.
    These will be used to authenticate requests to the Skcrew web API.
  1. Review the configuration file and save it.
    Our final configuration file should look like this:

    Final Proxy Server Configuration
    socket-server-port: 59550
    
    web-server-enabled: true
    web-server-port: 55792
    web-server-user: "USER"
    web-server-password: "PASSWORD"
  2. Restart the proxy server to apply the changes.

And that’s it! Skcrew is now set up on your proxy server.

Setting up Skcrew for networking on a Back-end Server.

Step 1: Install Skcrew on the Back-end Server.

  1. Download the latest version of Skcrew from the Releases section on GitLab.
  1. Move the downloaded file into the plugins/ directory of the back-end server.
  1. Start the back-end server.

Step 2: Configure Skcrew on the Back-end Server.

  1. Open the Skcrew configuration file.
    This file is located in the Skcrew directory inside the plugins/ directory of the back-end server.
  1. Set the sockets.enabled to true.
    This will enable the sockets module for Skcrew, allowing it to communicate with the proxy server.
  1. Set the sockets.server-address to the IP address of the proxy server.
    This is the address that the back-end server will use to connect to the proxy server.
    Can be both an IPv4 or a domain name.
  1. Set the sockets.server-port to the port that the proxy server is listening on.
    This is the port that the back-end server will use to connect to the proxy server.
  1. Set the sockets.client-autoreconnect-time to the desired value (in seconds).
    This is the time that Skcrew will wait before trying to reconnect to the proxy server if the connection is lost.
  1. Review the configuration file and save it.
    Our final configuration file should look like this:

    Final Back-end Server Configuration
    sockets:
      enabled: true
      server-address: "PROXY_SERVER_IP"
      server-port: 59550
      client-autoreconnect-time: 5
  2. Restart the back-end server to apply the changes.

And that’s it! Skcrew is now set up on your back-end server and is ready to communicate with the proxy server.