Proxy Setup
This guide provides detailed instructions for installing Skcrew on a proxy server.
The setup utilizes
Velocity and
PaperMC .
Additionally, the BonfireMC version of the Pterodactyl Panel is used to configure networking.
However, the process is essentially the same for the standard Pterodactyl Panel.
PS: This guide is not a complete tutorial on how to set up a proxy network, but rather a guide on how to set up Skcrew on a proxy server.
Setting up Skcrew for networking on a Proxy Server.
Step 1: Install Skcrew on the Proxy Server.
To install Skcrew on the proxy server, follow these steps:
Download the latest version of Skcrew from the Releases section on GitLab.
Move the downloaded file into the plugins/ directory of the proxy server.
Start the proxy server.
Step 2: Allocate ports for Skcrew.
To allocate ports for Skcrew, you will need to head over to the Networking section of the Pterodactyl Panel.
In the Networking section, you can allocate ports for your proxy server.
To do this, follow these steps:
Navigate to the Networking section of the Pterodactyl Panel.
Looks like this:
Click on the Create Allocation button (Twice).
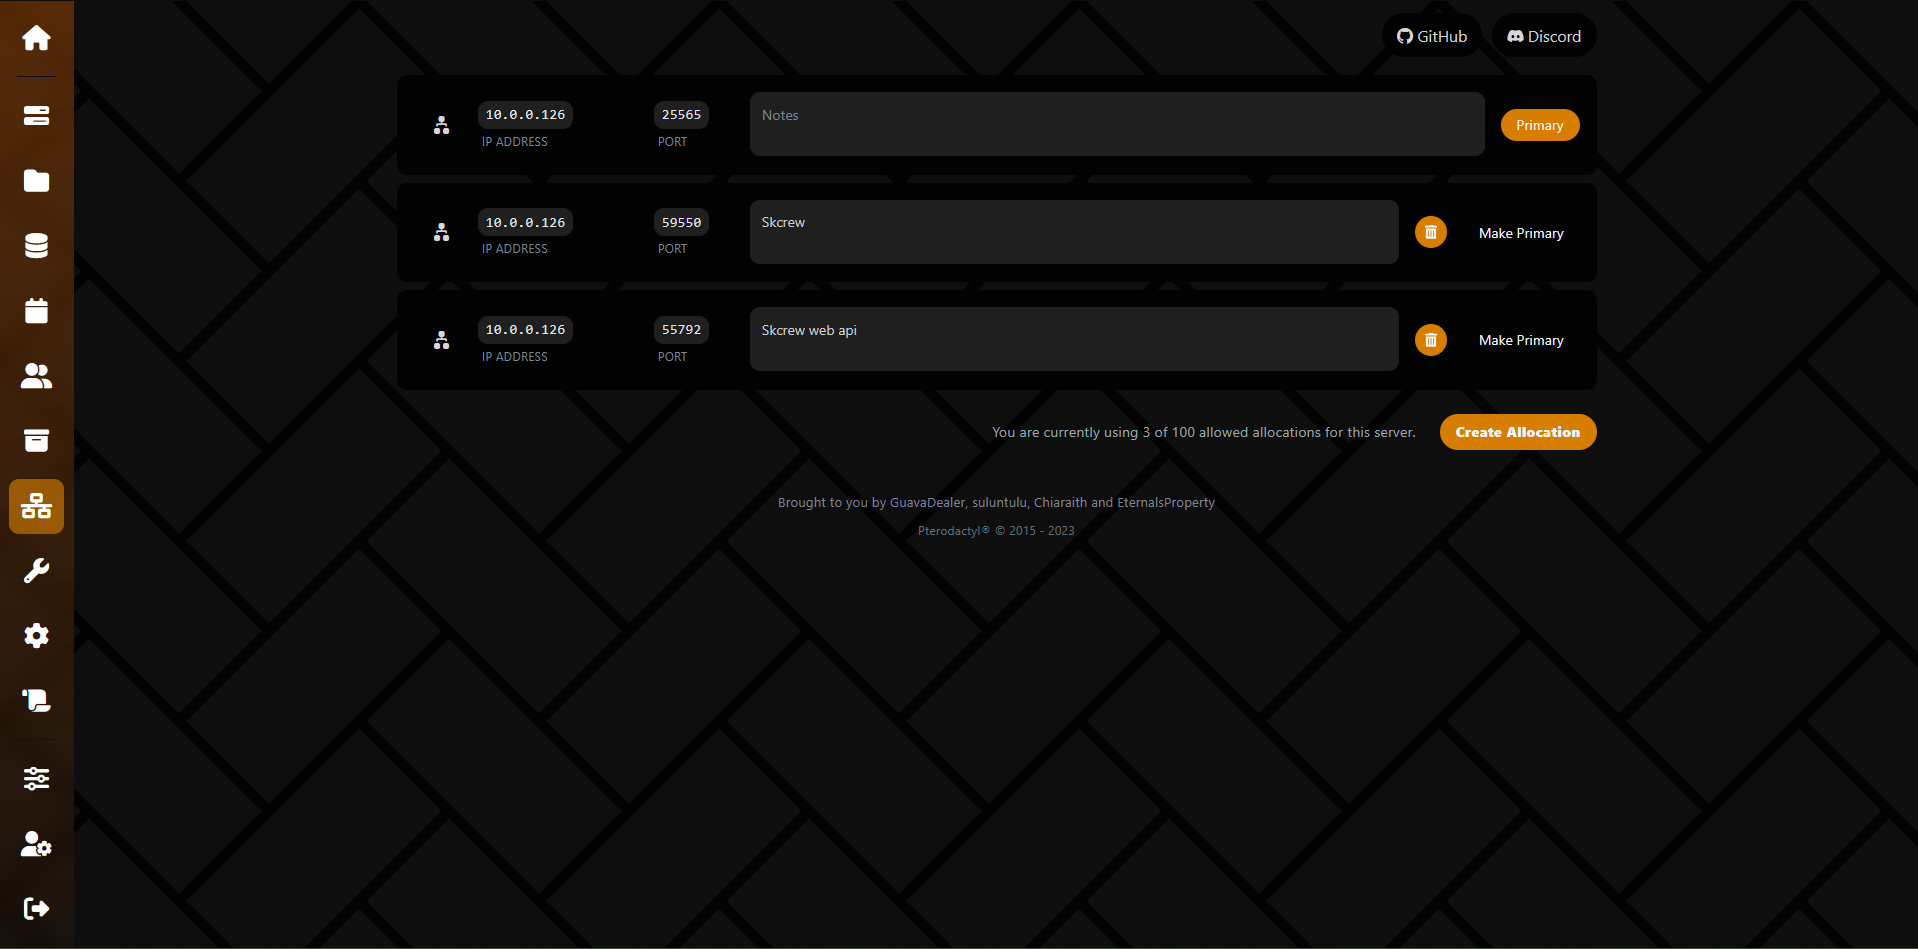
Optionally, you can give them a name, such as
SkcrewandSkcrew web apior something similar.
- Copy the allocated ports to your clipboard.
In this case, the ports are59550and55792.
We will need these ports in the next step.
Step 3: Configure Skcrew on the Proxy Server.
- Open the Skcrew configuration file.
This file is located in the Skcrew directory inside the plugins/ directory of the proxy server.
- Set the
socket-server-portto the first allocated port (in this case,59550).
This is the port that Skcrew will use to communicate with the proxy server.
- Set the
web-server-enabledtotrue.
This will enable the web server for Skcrew, allowing you to access the Skcrew web API.
- Set the
web-server-portto the second allocated port (in this case,55792).
This is the port that the web server will listen on.
- Set the
web-server-userandweb-server-passwordto your desired values.
These will be used to authenticate requests to the Skcrew web API.
Review the configuration file and save it.
Our final configuration file should look like this: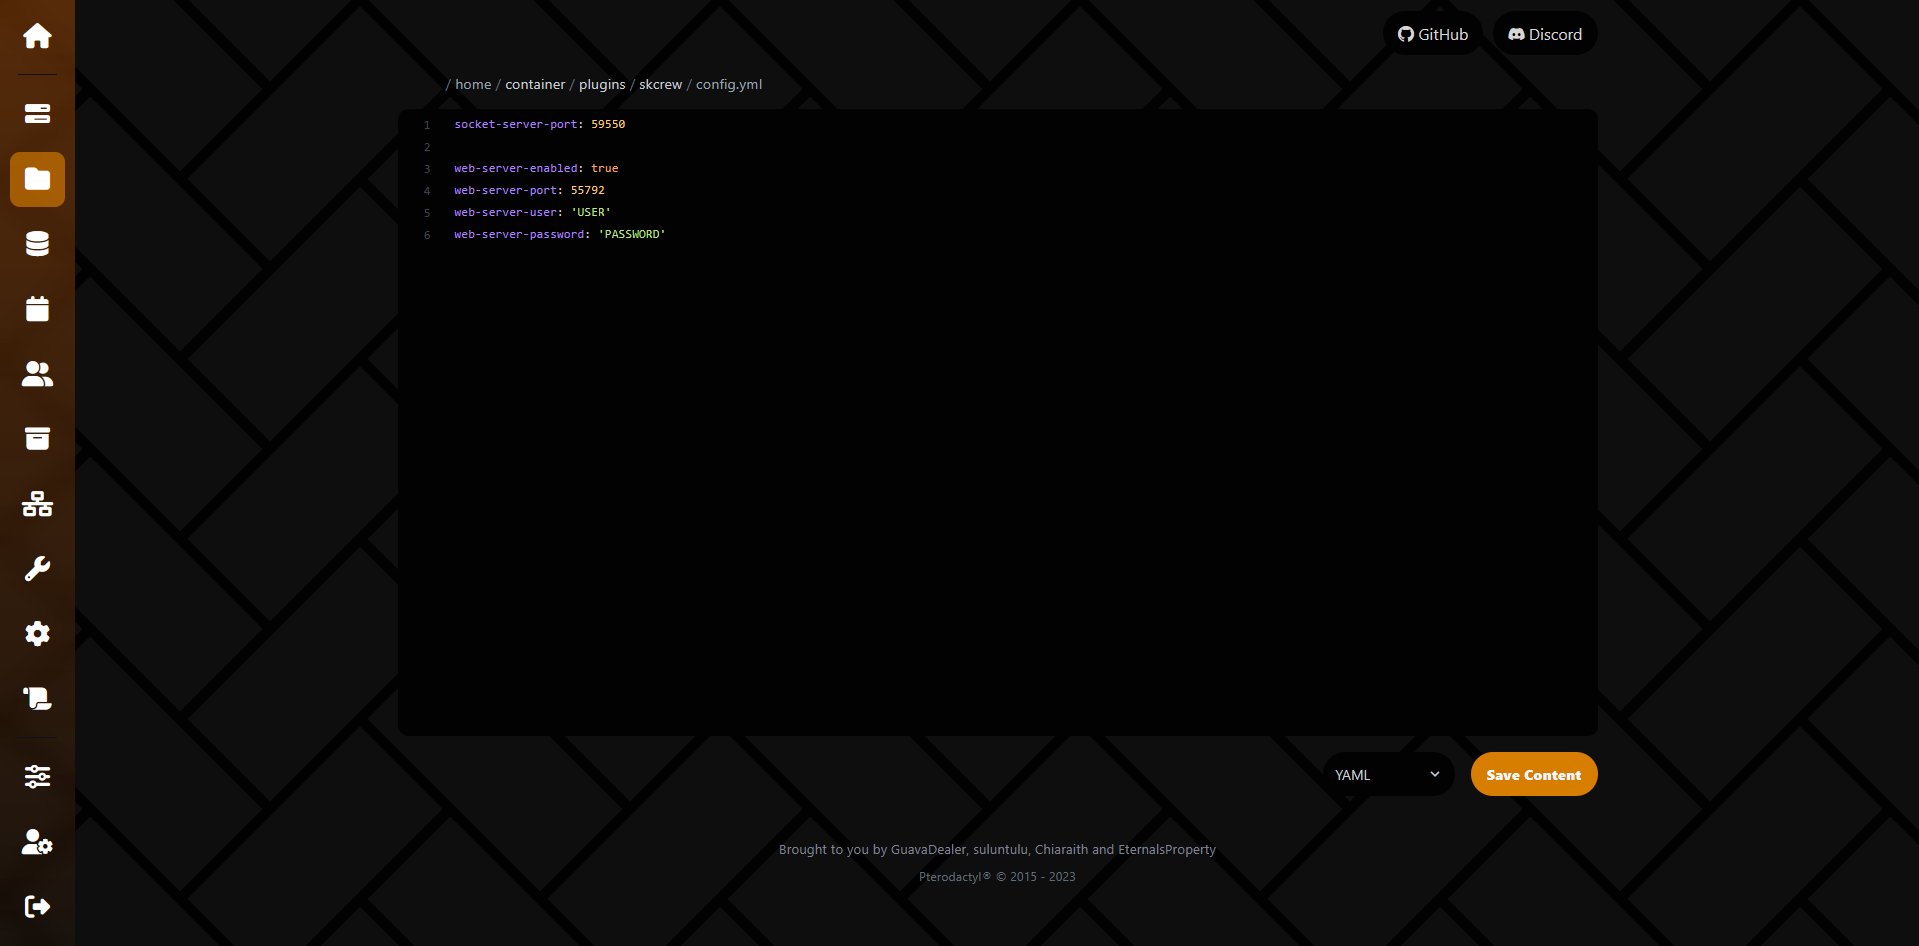
Restart the proxy server to apply the changes.
And that’s it! Skcrew is now set up on your proxy server.
Setting up Skcrew for networking on a Back-end Server.
Step 1: Install Skcrew on the Back-end Server.
- Download the latest version of Skcrew from the Releases section on GitLab.
- Move the downloaded file into the plugins/ directory of the back-end server.
- Start the back-end server.
Step 2: Configure Skcrew on the Back-end Server.
- Open the Skcrew configuration file.
This file is located in the Skcrew directory inside the plugins/ directory of the back-end server.
- Set the
sockets.enabledtotrue.
This will enable the sockets module for Skcrew, allowing it to communicate with the proxy server.
- Set the
sockets.server-addressto the IP address of the proxy server.
This is the address that the back-end server will use to connect to the proxy server.
Can be both an IPv4 or a domain name.
- Set the
sockets.server-portto the port that the proxy server is listening on.
This is the port that the back-end server will use to connect to the proxy server.
- Set the
sockets.client-autoreconnect-timeto the desired value (in seconds).
This is the time that Skcrew will wait before trying to reconnect to the proxy server if the connection is lost.
Review the configuration file and save it.
Our final configuration file should look like this: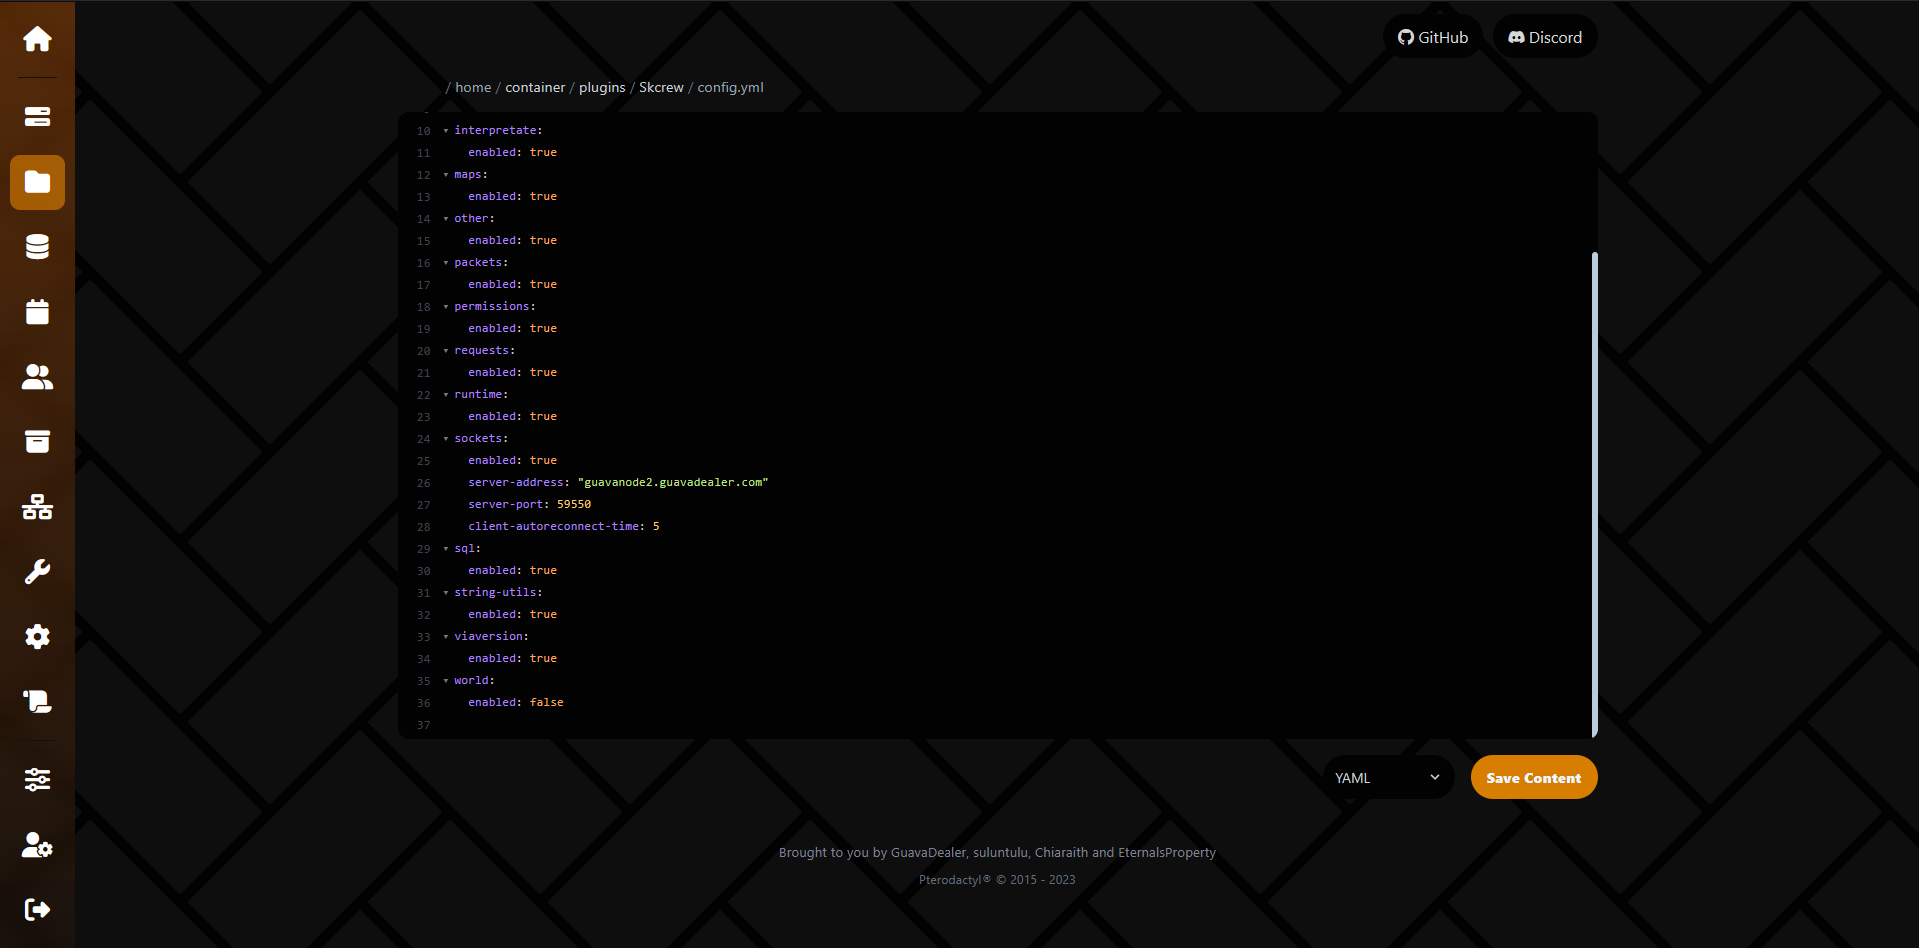
Restart the back-end server to apply the changes.
And that’s it! Skcrew is now set up on your back-end server and is ready to communicate with the proxy server.